The making of Don Matrelli’s Legacy
Part II: trackbuilding
The story so far: in the past episode, the asset formats of Grand Prix Circuit (GPC) have been reverse engineered. Our hero, just like Ben Sulayem, is now planning to meddle with the season calendar and replace some tracks with others of his liking.
I am embarassed to admit it, but I know the shape of some F1 tracks only because of Grand Prix Circuit’s minimaps.
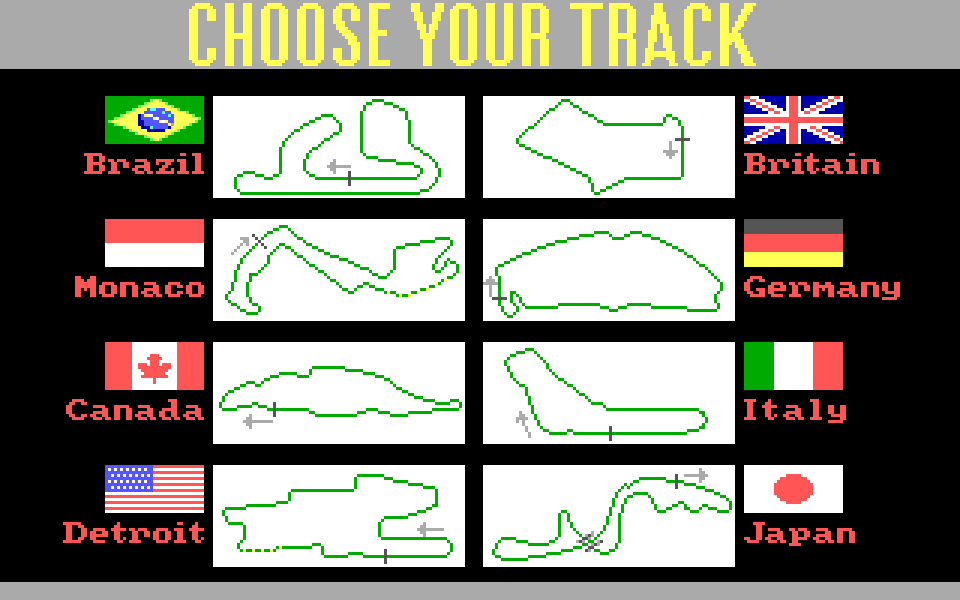
Building a mod was the occasion to slightly reduce my ignorance. The time spent converting a real-life raceway into bits and bytes, working on graphics and playtesting, got me a much better familiarity with the venues I chose and with the game in general.
I’d be happy if other players tried their hand at creating circuits for GPC. My usual blog posts are more a diary than a manual, but this post will try to be both, and historical accuracy will often be sacrificed for didactical purposes.
Let’s start with the to-do list. These are the steps required to make a new track, in my recommended order.
- Choose which circuit to add, and which one will make place for it.
- Trace the minimap.
- Update the menu screens.
- Build the track layout in assembly.
- Paint the horizon.
- Synchronize the minimap.
- Calibrate the opponent AI.
But before we start the effort, a little ad break.
Unpaid commercial
The amount of graphics editing involved in building a new circuit is significant: it pays off to choose and learn to use a suitable editor if you don’t already have a favourite one.
In the past I have used screenshot-oriented software like Shutter and ksnip, but in this project the limits of such programs became evident very soon.
While looking for a suitable editor for pixel art, I stumbled across the video “mtPaint - Demystifying an esoteric painting program”, which convinced me that this was the editor I needed: mtPaint soon became the main tool in my modding workshop.
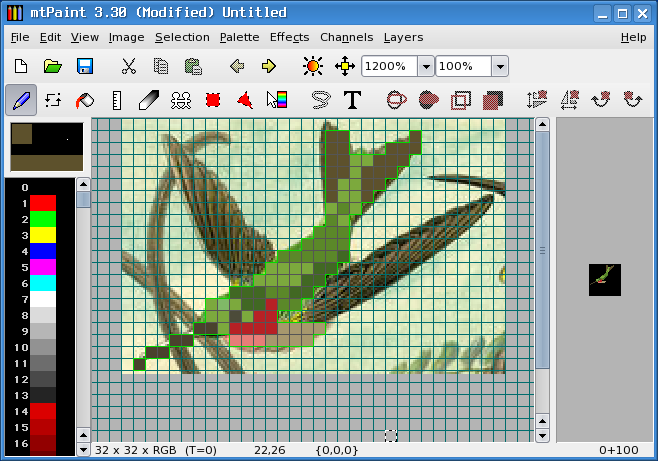
I highly recommend to give this software a try: as the cited video says, its conventions are far from usual – one even needs to learn how to copy-paste between program instances – but it’s really lean and powerful, and very well-suited to this job.
A bitmap editor is your most important tool. Other useful programs you may need are a screen recorder (I use SimpleScreenRecorder) and a video player, hopefully able to move forward and back by single frames (like SMPlayer). Also recommended is ImageMagick.
Now let’s return to trackbuilding, looking at each of the steps in detail and examining how they they were implemented for Don Matrelli’s Legacy.
Track designation
Choosing a track to add is obviously a matter of taste. However, to decide which existing circuit to replace one must take size into account. According to my analysis there are very few free areas in the data segment, so one is mostly forced to reuse the space freed by the removed circuit: this means that a new track should replace a raceway that is at least of the same length. Here are positions and length of the track layout buffers in the base game.
| Track | Lap begin | Lap end | Length |
|---|---|---|---|
| Brazil | 2060 |
260B |
1451 |
| Monaco | 279D |
2B5E |
961 |
| Canada | 2C17 |
3116 |
1279 |
| Detroit | 31F9 |
3699 |
1184 |
| Britain | 3824 |
3D8A |
1382 |
| Germany | 3F12 |
4682 |
1904 |
| Italy | 47BF |
4E2A |
1643 |
| Japan | 4F3D |
5573 |
1590 |
0x10AF0.
The length is expressed in bytes, i.e. in track segments. A segment of straight track is about 4-5 meters long1, but corner segments seem shorter. Consider an average of 3.5 meter per segment.
Note that the easiest way to build a new track is to use DML.ASM as base and replace Spa, as explained later. If you do not feel comfortable with DOS hacking, select that slot.
Personal notes
In the case of Don Matrelli’s Legacy, deciding the calendar slots was surprisingly quick. After figuring out the track format, it took just ten minutes to write down the plan.
Firstly, I would add a fantasy circuit pushing the track format to the limit, showcasing some of the things I had seen during the reverse engineering process. Rows of meaningless road signs, galleries of “Finish” banners, strange tunnels. The track would be perfectly straight to allow everyone to reach the McLaren’s top speed. To add some lore, the circuit would be presented as “a dragster track made on a Möbius strip floating in space”. It sounds better in German: Möbius Raumdragsterrennstrecke. Since the plan did not need much storage size, and also to add another implausible detail, this circuit would eliminate Monaco from the calendar.
The other two raceways would be taken from the real world. One of them I almost had a duty to include: the glorious Circuit de Spa-Francorchamps is a track that no F1 game should ever lack, and I’d be happy to fix the omission. The Belgian track boasts more than one century of history2, an achievement that even other venerable candidates like Imola, Magny-Cours and Paul Ricard will take time to reach. Unfortunately, implementing Spa required to give up the German GP: only the removal of the Hockenheimring could free up enough space to accommodate the 7-km track.
I added a third track, I must confess, only to get rid of Detroit: nothing against the city, but that troubled and short-lived GP had no place alongside other seven respected and famous circuits. What to put in its place? For a moment, I considered building a “Generic Soulless Tilkedrome”, a mish-mash of the worst tropes associated with Tilke Engineering and its monopoly on F1 circuit building. But common sense prevailed: I was already trolling enough with the Möbius track, spending weeks just to create another provocation seemed like an own goal. A better idea: instead of the worst ideas of Hermann Tilke, I would showcase one of his best creations, the Baku City Circuit. Everything seemed favourable: including a street circuit was due after the two original ones had been replaced by high-speed tracks, adding a modern track completed the history trip between the past (Spa) and the future (Möbius), the Azerbaijani city offered beautiful views, and I could even keep some meme element by adding a reference to the award-winning photo of Verstappen’s 2021 crash.
Minimap tracing
Creating the minimap is a perfect starting task: it’s the prerequisite of various later steps, helps to familiarize with the chosen circuit, and allows to quickly see the first customizations in the game graphics.
Whether your editor is mtPaint or something else, you’d better have the EGA palette at hand. You can download it here.
Nothing obliges a designer to obey GPC’s guidelines (dark cyan background, white frame, black track etc.). One can probably even use a size other than the standard 88x37, but I have not experimented in that sense. Assuming you want to build a conventional minimap, the procedure is simple.
- Procure the circuit map. Wikipedia has many, including the historical versions of tracks that changed with time.
- Convert the image to bitmap format, and scale it down to 88x37 pixels. The track boundaries should fit in a smaller rectangle, leaving at least 3 pixels on each margin: one for the white border, one as distancer from the border, one for a reason we will discover later.
- Trace the image. The following images show how it’s done with mtPaint.
Note: in these screenshots the bitmap size is mistakenly set at 120x37 and the white frame is not on the picture border as it should. Take them just as illustration.
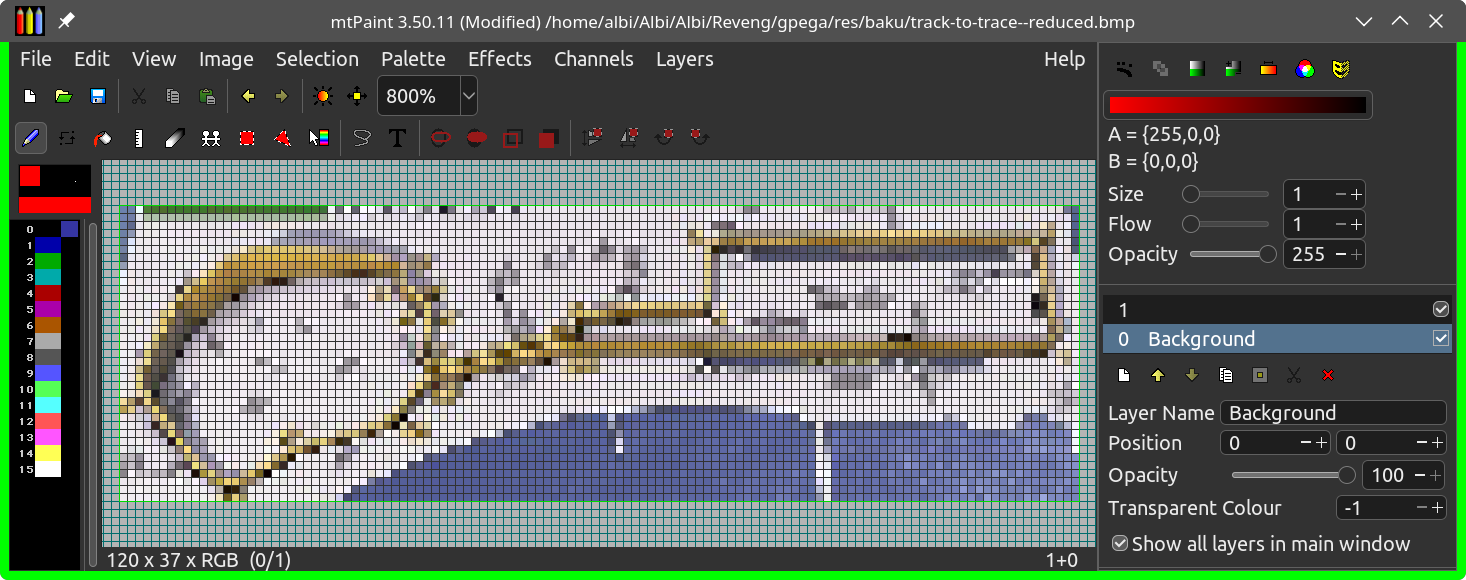
This is taken from motorsport.com;
better would be to get a free image.
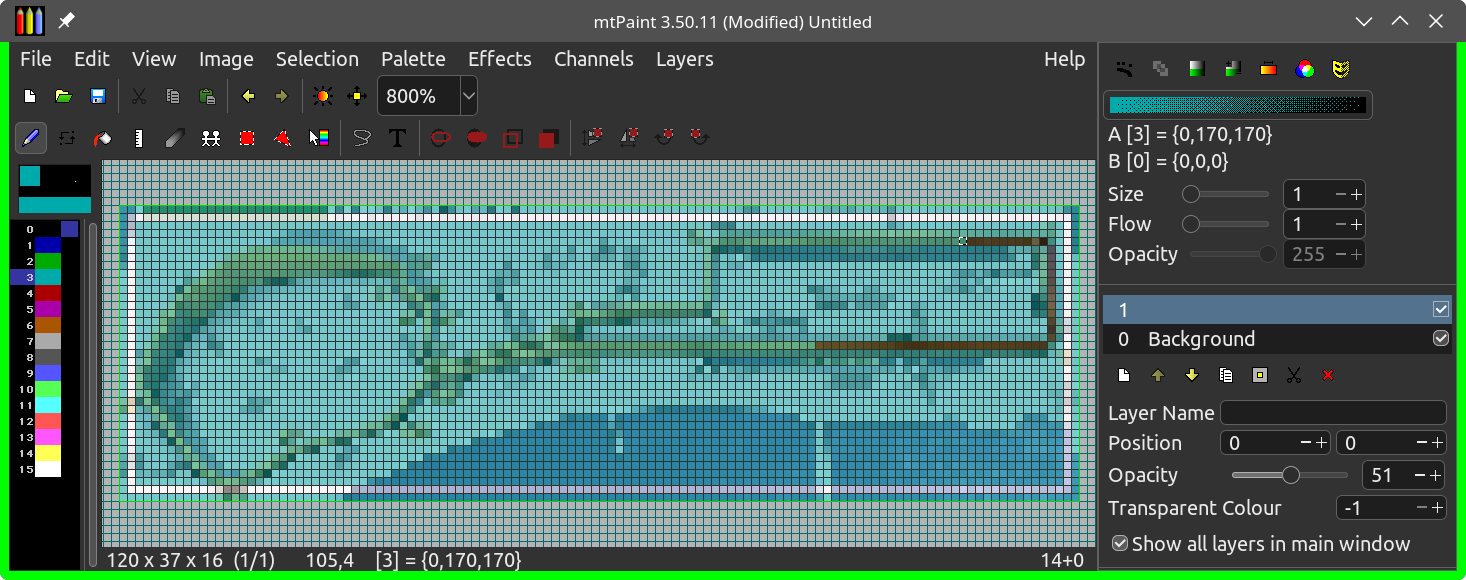
and draw the white border. Then make it
semitransparent and start to trace.
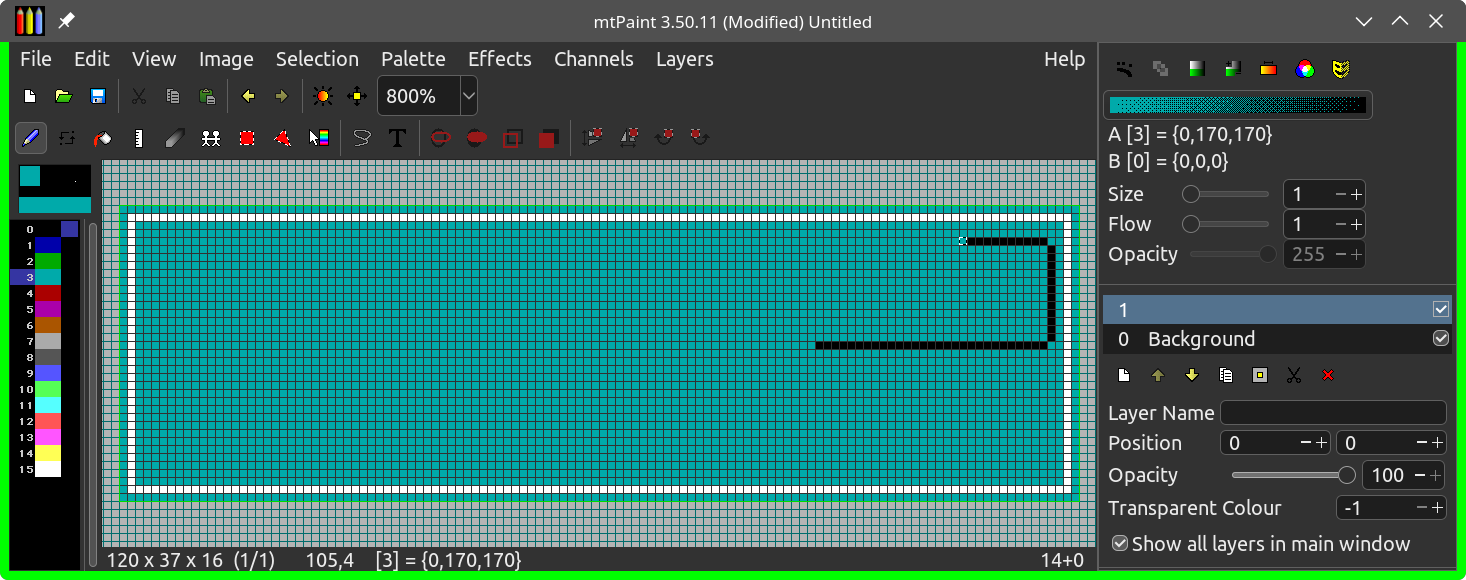
Notice how the sample traced track is missing black pixels in the corners: this is the style of the original GPC tracks. If you put angular black pixels, the isolated minimap will look OK but will feel slightly “blacker” than necessary when sitting alongside the others in the track selection menu.
After completing the track,
- Add the white start/finish line and a yellow arrow to show the direction.
- Start Stressed (download it from here)
- Select
Options / Compression Format / Grand Prix Circuit - Open the
.PESor.ESHfile of your desired track - Select the sprite named
map_ - Import your new bitmap
- Select
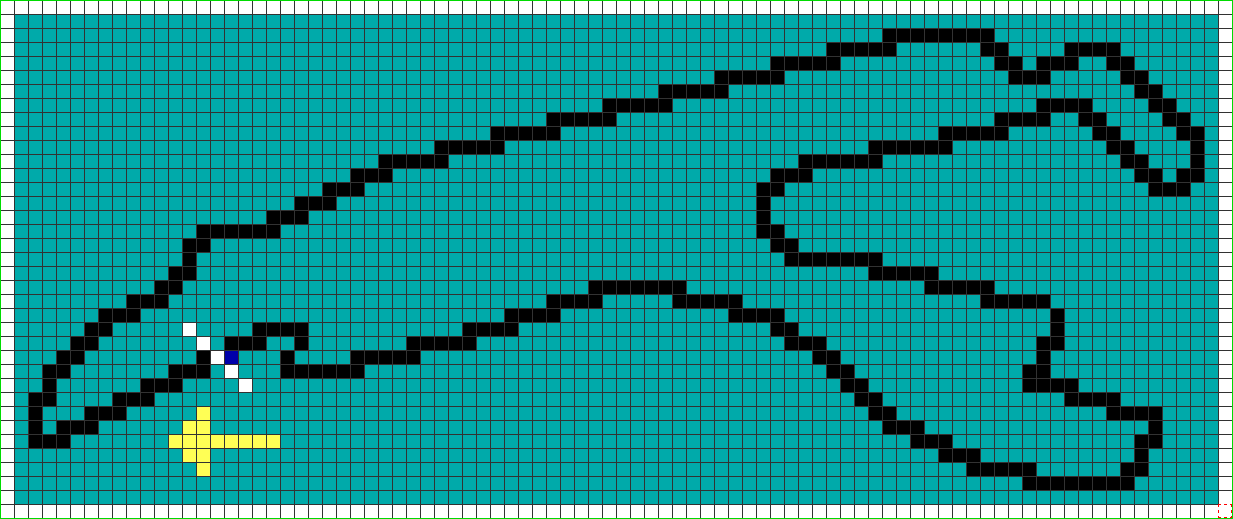
Here is how it went for Don Matrelli’s Legacy:
- The Möbius track, in pure “because I can” spirit, has a freeform bitmap: a 3D representation of a Möbius strip in a starred sky, crushed down into a low-pixel EGA sprite.
- The Baku track was the simplest to trace, its proportion fitting nicely in the 88x37 rectangle.
- Spa was slightly trickier: I rotated the map to maximize the width-to-height ratio, but the conventional orientation is already the best one for that. So I was forced to either leave unused space on the sides or compress the track vertically. I chose the second solution: the proportions might be a little altered, but such a big and complex track benefits from any available pixel.
Menu screens
There are three screens to be customized; let’s analyze each of them.
Track selection menu
The track selection screen is located in F1SELEC3.PES, and is made of a single 320x200 bitmap covering the whole screen.
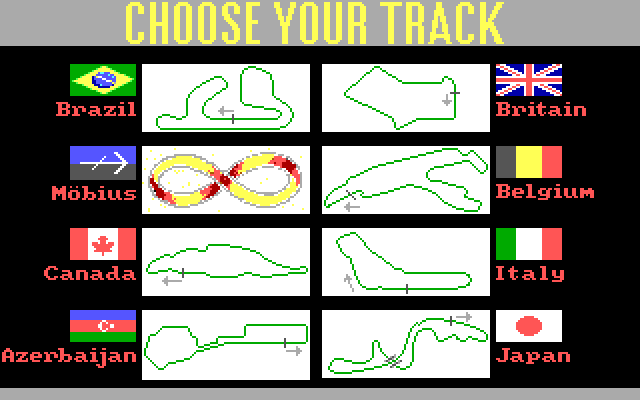
The first thing to do is to copy-paste your minimap into the desired slot and adjust its colors. You will have to crop away some pixels on the borders: that’s why you were warned to leave a sufficient margin. If you have used non-standard colors, start the game and ensure they looks good when you select the track with the in-game cursor.
After placing the minimap, draw the flag. If it is very detailed you will need to find a way to simplify the design into the limited pixels available, but no big deal.
Finally: the name. The font used in this screen is the usual 8x8 “IBM BIOS”. To compose your word, you can copy-paste the existing letters or visit the linked site to write a sample text. As for me, I could not believe I had found an excuse to return to one of my most beloved programming languages and GUIs.
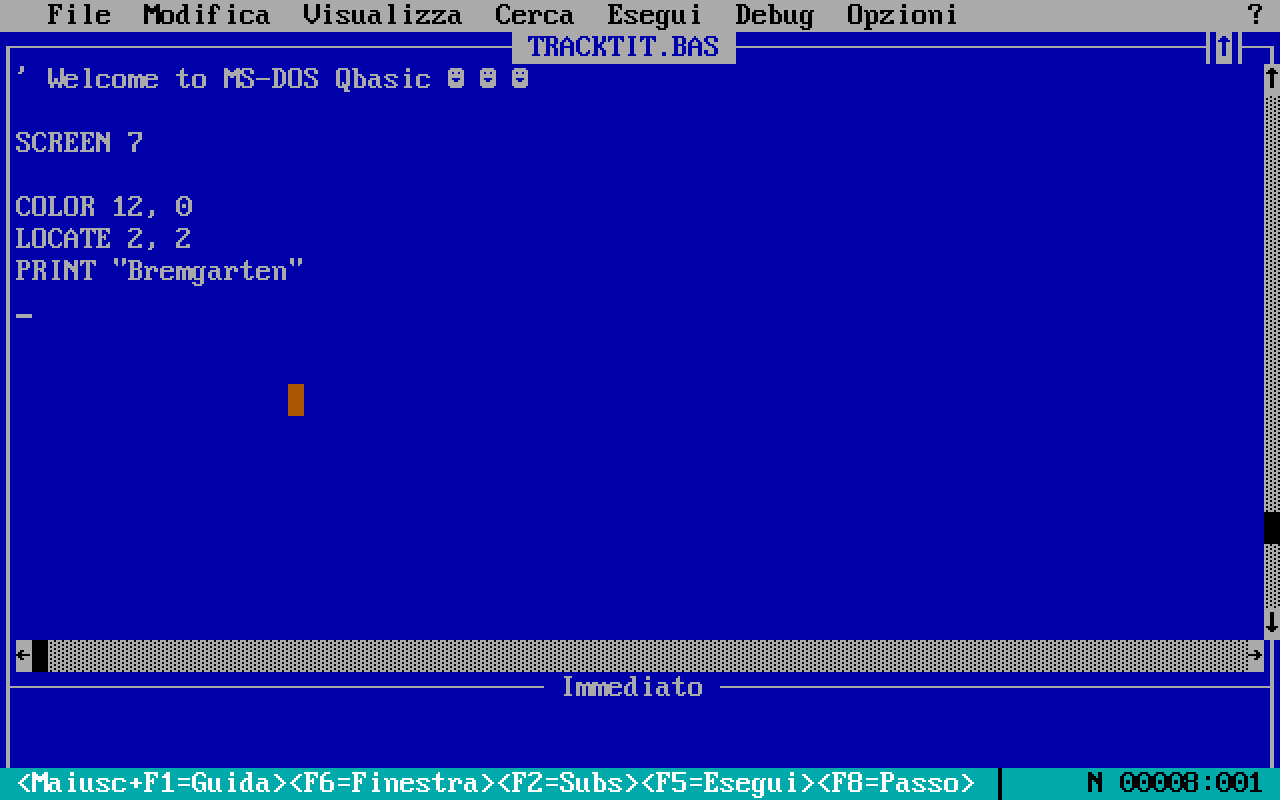
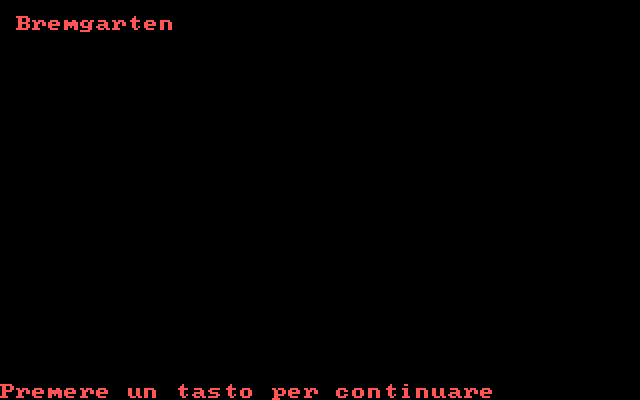
Ladies and gentlemen, here’s to you QBasic! Coming directly from the DOS 5.0 floppy disks of my father’s Olivetti 386, this program was one of the first IDEs I ever used. Its user-friendly and practical interface was leaps and bounds better than GW-Basic’s darkness – and than many apps of the current era, I’d say. Nostalgia aside, QBasic is also the perfect tool for printing text in IBM BIOS font: just select SCREEN 7 to sets the correct screen mode (320x200, 8x8 characters), choose the color, and print what you need. Then copy-paste the resulting text into the target image.
Sharp eyes will notice that the spacing between letters in the output of the BASIC program, with each glyph in its 8x8 box, is wider than in the track selection screen. If you are as finicky as me, you might want to slightly adjust your freshly-printed track name so that it blends in better with the others. In my case, playing with the kerning was also necessary to make the work “Azerbaijan” fit in the margin. I even had to draw a custom “j” to better slide it under the preceding “i”!
Tournament standings
This is another 320x200 bitmap, located in STATUS.PES with sprite name stat. Surprisingly, its status bar and track names are not fprint-ed, but baked into the image. The writings here have the normal non-proportional kerning, so you can simply copy-paste the output of the BASIC program.
Circuit header
The track headers are a small touch that I always found lovely: their tall and narrow typeface packs a lot of personality in few pixels, and reading the circuit names in their original language (including Monza in my own) adds to the experience.
Making your own header should be simple, moreso if you use the existing ones as palette:
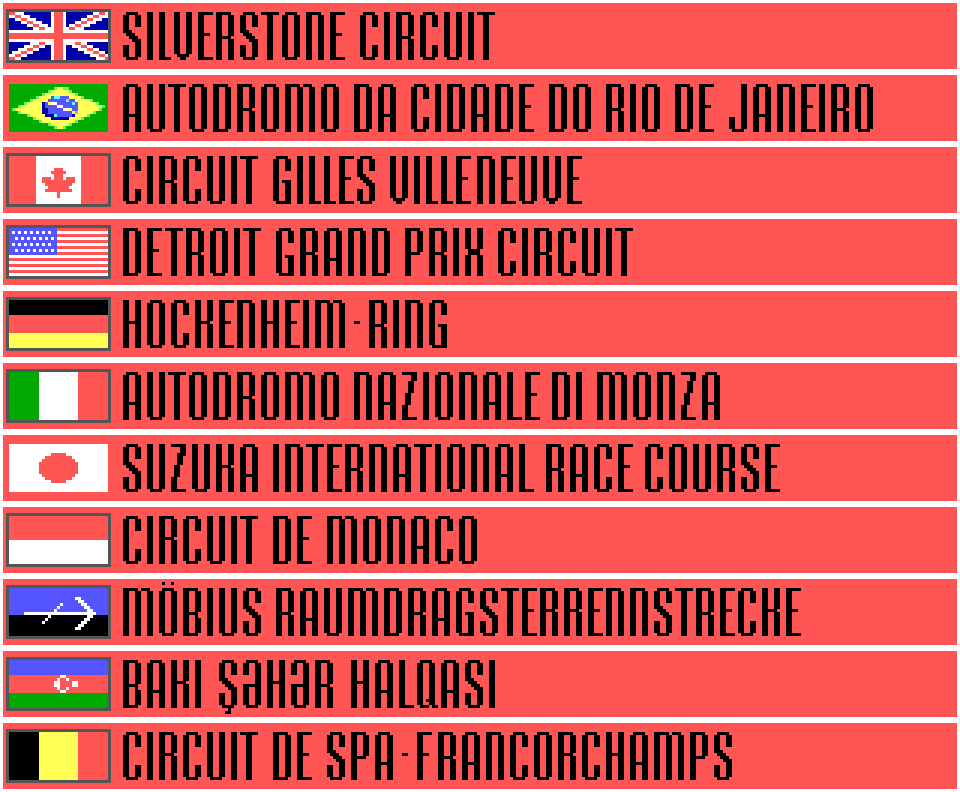
Copy-paste the flag you created in the track selection screen3, then combine the letters from the existing headers to form the title of your new track. You might need to craft a couple of new glyphs – the Baku track needed the “Ş”, the “Ə” and the “Q” – but that should be easy if you use the existing ones as model.
When you are done, import the resulting sprite into STATUS.PES, overwriting the header of the circuit you are going to replace.
Track layout
The previous steps were little more than an introduction: now the big tasks start!
Two ways to hack in
This is the first time we need to touch the main program data, so you must decide which method to use:
- editing the game executable (
GPEGA.EXE), or - overwriting the working memory at runtime.
If you want to edit the executable:
- Get CyclesMod.
- Use it to create an uncompressed version of
GPEGA.EXE. - Open the resulting binary in a binary editor, check the output is correct by navigating to offset
0x10AF8and verifying it contains the string"MS Run-Time Library - Copyright (c) 1987, Microsoft Corp" - Assuming the check was successful, find your track by navigating to offset
0x10AF0 + lap_begin. Get thelap_beginoffset from the table in the “Track designation” paragraph.
If you want to mangle the memory at runtime, doing that from scratch is tricky, but you can use the TSR part of Don Matrelli’s Legacy as base. The easiest way is to build your track in place of Spa, since it’s the one that offers the biggest amount of space:
- Download
dml.asm. - Locate Spa by searching for the label “
spa_track:” (including the colon) - After editing the track, compile the file using FASM and overwrite the
DML.COMin the directory where you installed Don Matrelli’s Legacy. - Launch the mod with
GPEGA2, as usual. - At the very end of the project, you can move the track from the Spa slot to the target one: this is left as exercise for the reader. In the meanwhile, use
BELGIAN.eshas name for the track datafile.
If you edit the executable, be very careful to always leave the same number of bytes you started with: check the size of the .EXE remains unchanged at every save. If you work with the asm, you are a little safer: just ensure your number of track pieces does not exceed the original one; if they are less than that, it’s not a problem.
Whichever method you choose, start small. Change 20-30 bytes near the start, to ensure your modification method is working. If everything looks right, proceed with your project.
Bring on the road pavers!
Even with a blueprint to follow, the blank page syndrome might kick in. Don’t worry, building a good first draft of your track is not so hard. Begin with this:
    ; The canonical circuit start
    times  33 db 00h  ; starting grid
    times   1 db 31h  ; start/finish
    times   6 db 32h  ; checkered floor
Then proceed one piece at a time. Ignore the fancier track elements: just use straights (ID 0x00), right curves (IDs 0x01 to 0x15, from very mild to very sharp) and left curves (IDs 0x17 to 0x2A, dito). Look at the the Baku track: it’s just a succession of straights alternated with constant-radius curves.
    times  44 db 00h  ; start to (1) (Neftçilar proskekti)
    times  16 db 24h  ; (1)
    times  58 db 00h  ; (1) to (2) (Puşkin küçəsi)
    times  16 db 24h  ; (2)
    times 144 db 00h  ; (2) to (3) (Xaqani küçəsi)
It should not take long to get a feeling for how to use the components. You also have many existing tracks to take inspiration from: if a curve you want to build resembles the Copse, you can copy-paste the corresponding bytes from the British GP and adjust them to your use case.
It might be helpful to note down, alongside the assembly or in a separate text file, the correspondency between the bytes and the circuit features they reproduce. For me, learning the road names in Baku (taken from OpenStreetMap) was helpful to get acquainted with the circuit. The same goes for Spa’s corners.
How meticulous you want to be in your trackbuilding is up to you: after all, GPC is a game where one can take at full speed Monza’s Variante del Rettifilo (the “S” immediately after the start) and Monaco’s Nouvelle Chicane (after the tunnel). Also, there is no track validation, leaving space for various tricks. However, here are some hints if your goal is a truthful reproduction.
First, add dimensioning annotations on your source map, measuring lengths and angles.
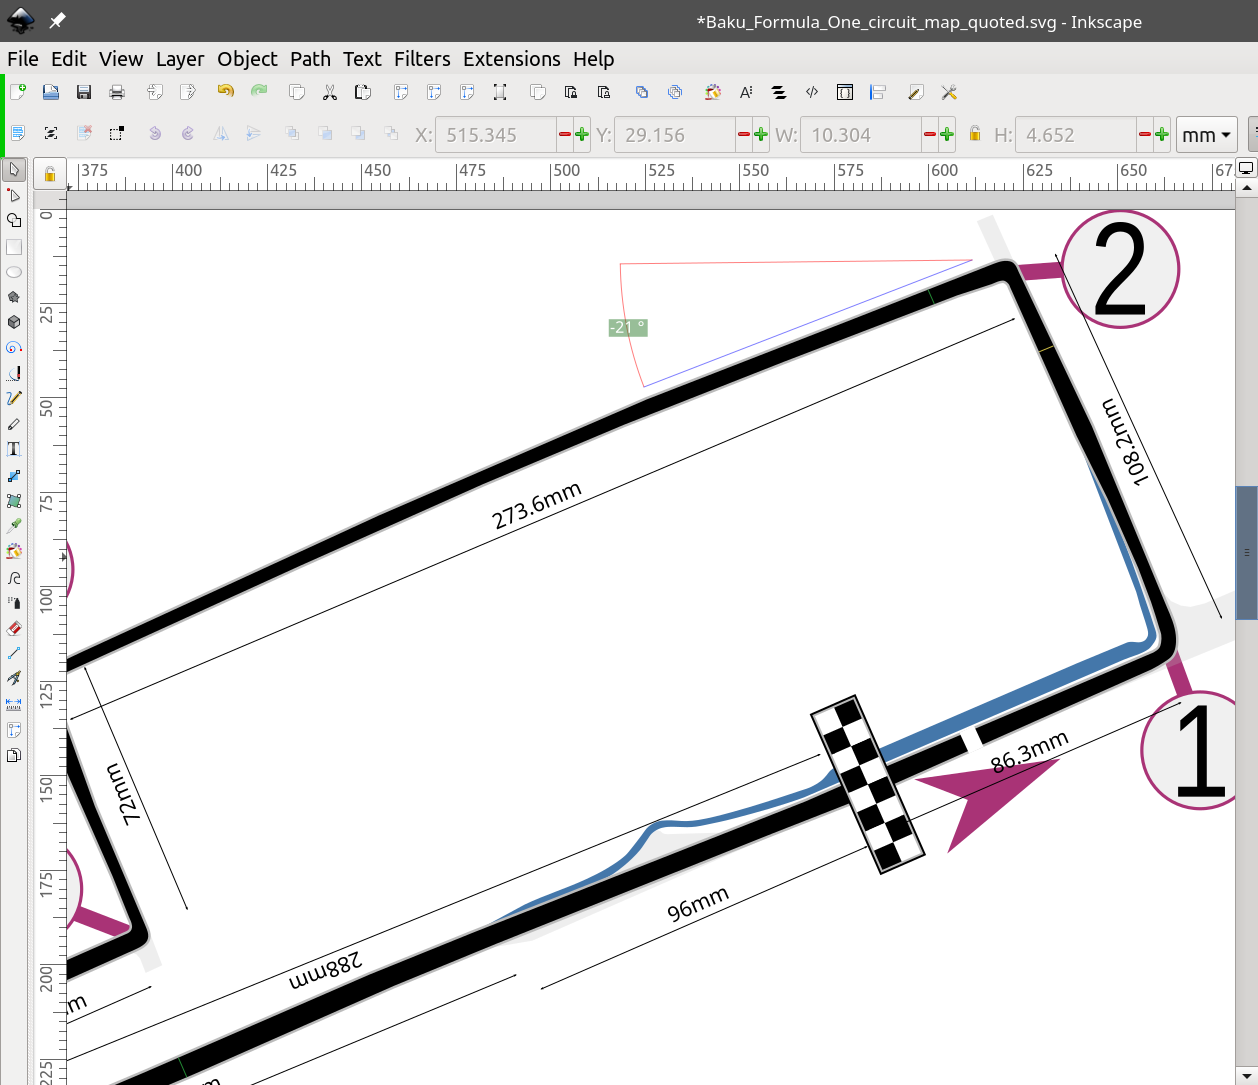
Calculate the total length. Compare it with the available track segments to calculate the proper scaling. Keep in mind that curves are very small in maps but they take up many bytes, so assume that the parts you dimensioned should only occupy 2/3 of the available space.
Second, you can better check the orientation of your track segments by making your background into a giant compass:
You can obtain this effect by downloading this file and giving it the appropriate resource name (e.g. BELGIAN.esh if you are modding Spa). Change the number shown in the sprite scen to the orientation of your car when sitting on the starting grid, then update the other sprites accordingly. You can verify that your compass direction after each curve is the expected one.
Finally, record and replay your test laps: this will save you time and effort. It’s all too common to notice a mistake at lap start and forget it at the end, or losing count of which curve you are in. A replay solves all these difficulties, and also lets you build a visual history of how your work is developing.
When you have built all the track segments and are heading to the finish line, it’s time to set up the lap end.
- Terminate your work with a copy of the canonical circuit start sequence (see above).
- Append a
0xFFbyte to it. - Note down the address of the first byte of the sequence. This is your new
lap_end. - Determine your
track_indexfrom the position of the track in the tournament calendar (Brazil = 0, Japan = 7). - Update the
lap_endpointer of your circuit:- If you are editing the data segment, the pointer is at
DS:1F2E + 4*track_index. In case you are working on Spa inDML.COM, locate the instruction starting withmov word [es:1F42h],and replace the operand with newlap_endvalue. - If you are editing the unpacked
EXEfrom CyclesMod, the pointer is at12A1E + 4*track_index. - In both cases, check the pre-existing value. If it’s too different from yours, you are probably at the wrong address.
- If you are editing the data segment, the pointer is at
The value of lap_end should be smaller than the original one (for Spa/Germany, 0x464A). Replacing a track with a slightly bigger one is sometimes possible (I did it for the Detroit → Baku switch), but you’re on your own.
Ensure that the game is now ending your lap correctly: run in practice mode and check the lap counter, or play a single race and check that your qualification run ends properly. Also, check you do not get glitches while heading to the finish line: if so, your lap_end value is incorrect or was written in the wrong place.
The final touches
After you are satisfied with your straights and curves, it’s time to add the last details and do some polishing.
Ensure that the background you see when returning to the finish line is in the same place of when you started. If this is not the case, it means the total rotation of your curves is not (a multiple of) 360° and you should adjust your layout. With the “compass” background you can make an almost pixel-perfect check: cross the finish line while keeping your car on the midline, and you should see the big yellow mark aligning with the midline too.
Add road signs: IDs [0x2F, 0x2D, 0x2B] on the left, [0x30, 0x2E, 0x2C] on the right. If you follow GPC conventions, the 150-100-50 signs should appear exactly 30, 20 and 10 bytes before the start of the curve (remember to replace a corresponding piece of straight, not to just insert the byte). In GPC, the signs always appear on the opposite side than the curve, but my mod breaks this convention in all possible manners (Möbius has road signs spread around casually, Baku has none, Spa has them in their real-life position).
Place the pit lane. Replace a 154-segment straight with this incantation:
    times   1 db 37h  ; Pit: entry flag
    times  64 db 36h  ; Pit: entry lane
    times   4 db 3Bh  ; Pit: horz stripe
    times  16 db 39h  ; Pit: active zone
    times   4 db 3Bh  ; Pit: horz stripe
    times   1 db 38h  ; Pit: exit flag
    times  64 db 3Ah  ; Pit: exit lane
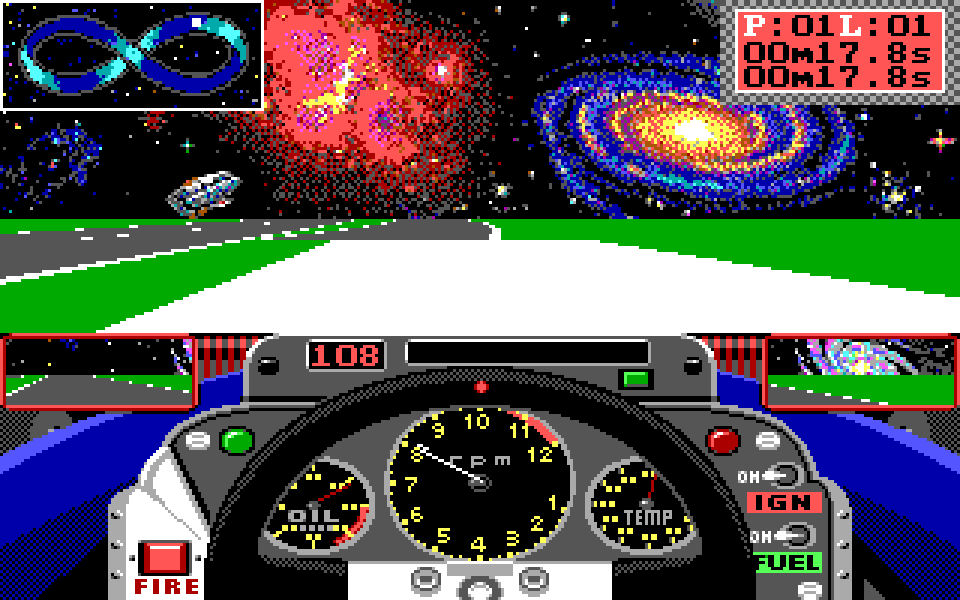
If you don’t have such a long straight, it’s up to you whether to rework the circuit or omit the pit lane. I forgot to put one in Spa and only noticed when I started to write these blog posts, so you should be fine. Having no pit is only a problem in long races.
After these steps, the track should be complete. Play it, and make adjustments till you feel fully satisfied of how it came out.
Personal notes
In making Don Matrelli’s Legacy, I had to learn the art of trackbuilding by trial and error.
The first circuit I created was Möbius: the original plan was to leave it as a long straight, but it felt a pity to make a circuit that would bore the players after the first run. On the other hand, I wanted to allow the McLaren to reach top speed. I experimented by adding wide curves, which could be negotiated without losing speed but required skill to do that. The attempt turned out much better than I hoped: reaching 217 mph on the resulting layout was exactly difficult enough to push my driving skills to the limit, and I enjoyed the challenge a lot. I never managed to complete two laps in a row without losing speed, but someone might achieve that: a test for real GPC masters.
The Azerbaijan GP was my first attempt to reconstruct a real-life circuit. Previously I wrote “everything seemed favourable”: the verb is important. I had overlooked the implications of fitting a 6-km track into a space thought for the 4-km Detroit GP. Even taking avail of some unused bytes, making the ends meet required to shorten all the straights. Not great, but the resulting “mini-Baku” came out surprisingly good: even without the treacherous walls and barriers of the real thing, the track is tricky to drive and the sharp curves of the technical section give at least a taste of what means navigating the narrow roads of the old city.
For Baku I could content myself with an approximation, but I wanted Spa to be perfect. I learned from the past mistakes and built tools and procedures, like the giant compass, to make the construction as precise as possible. I also studied the video of Verstappen’s 2023 pole lap, adjusting lengths and angles so that the time needed in each microsector matched Max’s performance as much as possible. I performed dozens of test runs, adjusting each byte till I felt satisfied. Where discrepancies remain, they are deliberate. In particular, I made the Eau Rouge slower than in real life: without the possibility to insert uphills, it’s impossible to do justice to that curve anyway, and the tighter version appearing in my mod makes it a critical point of the run, just as in the reality. In hindsight, my only regret is not reproducing the circuit as it was in 1992, with a different chicane at the end. But having an onboard lap as reference was a big advantage of using the modern version.
Painting the horizon
Creating custom horizon backgrounds is an optional step. In my opinion having original art is very important for the enjoyment of a track, but you are free to disagree and skip this section.
The track background is contained in the same .PES/.ESH file used for the minimap. It is contained in four sprites: scen is the background you see when the car is starting a lap. Turning 90° right three times will make you see sce2, sce3 and sce4 respectively.
The sprites sce3 and scen have a max width of 320 pixels, the other two of 192 pixels. The max height of the sprites is 75 pixels. The position of the top-left corner of each sprite against the virtual canvas is given by the (X-alt, Y-alt) coordinates, adjustable via Stressed. If you use sprites of the max size, you must set them at X-alt = 0 and Y-alt = 74 so that they cover the whole screen without going over the borders. If the sprites are smaller you have more freedom: calculate X-right = X-alt + width and Y-bottom = Y-alt - height + 1; you can play with these values as long as Y-bottom ≥ 0 and X-right ≤ 320 (for scen and sce3) or X-right ≤ 192 (for sce2 and sce4).
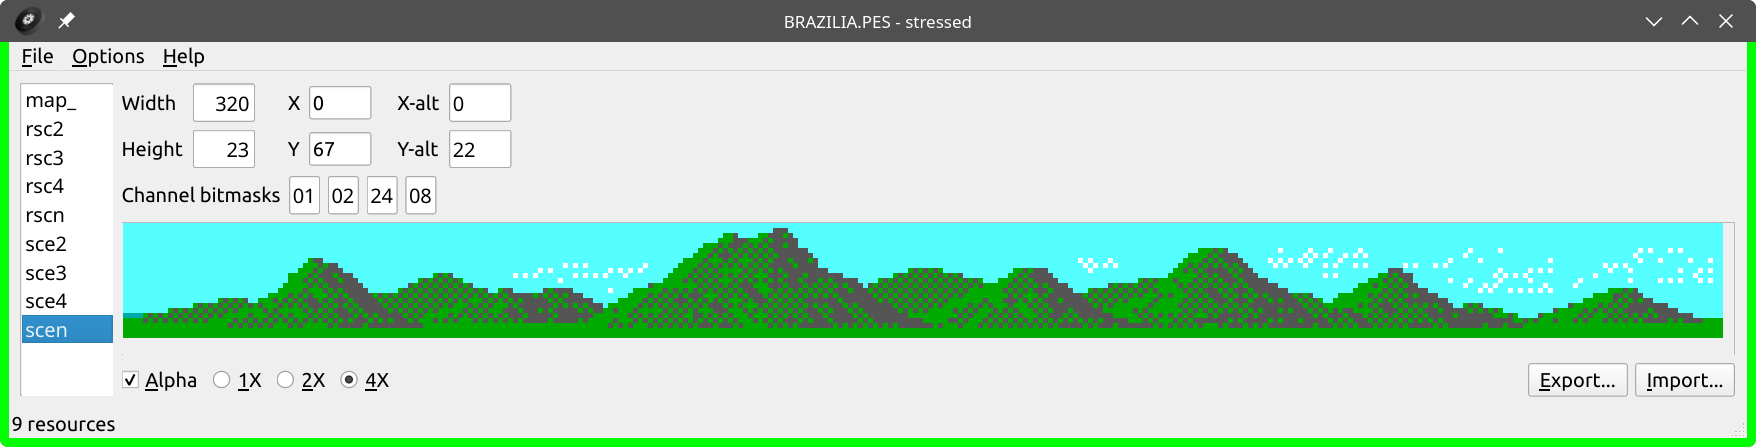
Y-alt = height - 1). I did the same in my mod.
If your sprite does not cover the whole canvas, GPC fills the missing parts with a cyan sky (I tried in vain to find the byte controlling the color in the game code) and draws a mobile cloud in a band 50-60 pixels above the horizon. The cloud is drawn “behind” your sprite, so it will be covered if your custom background is tall enough.
If you want immersive scenarios like in my mod, my suggestion is to paint the whole background as a big 1024x75 image (the width being the sum of the max widths of the four sprites) and cut it in four appropriately-sized pieces at the end. For example, to create the “huge compass” I started from this bitmap file and cut it using ImageMagick:

convert compass.bmp -crop 320x75+0+0   compass--scen-Front.bmp
convert compass.bmp -crop 192x75+320+0 compass--sce2-Right.bmp
convert compass.bmp -crop 320x75+512+0 compass--sce3-Back.bmp
convert compass.bmp -crop 192x75+832+0 compass--sce4-Left.bmp
To ensure consistency between right and left border, it’s worth to create a slightly wider bitmap, keeping a copy of the left zone beside the right border and vice versa.

The advantage of having a wider image is that you can play with the starting column when cutting it via ImageMagick: this allows to fine-tune the orientation.
After your horizon is ready, prepare the sprites for the rearview mirror background: they are rscn, rsc2, rsc3 and rsc4. You can generate them programmatically from the sprites of the front-view background:
convert BELGIAN--sce2-Right.bmp -resize 96x12!  -flop BELGIAN--rsc4-rLeft.bmp  -define png:preserve-colormap
convert BELGIAN--sce3-Back.bmp  -resize 160x12! -flop BELGIAN--rsc3-rBack.bmp  -define png:preserve-colormap
convert BELGIAN--sce4-Left.bmp  -resize 96x12!  -flop BELGIAN--rsc2-rRight.bmp -define png:preserve-colormap
convert BELGIAN--scen-Front.bmp -resize 160x12! -flop BELGIAN--rscn-rFront.bmp -define png:preserve-colormap
The -flop argument is needed because the rearview mirrors flip the view about the vertical axis: the same reason why medical transport cars carry the writing AMBULANCE.
After this, your background should be good to go! Make some test laps, ensure there are no glitches (symptom that some sprites are off-borders), that the views appear where you would expect them and that the sights in the rearview mirrors are consistent. If you used third-party assets and plan to distribute your work, do the right thing and acknowledge your sources, e.g. in the credits screen (file DSITITLE.PES, sprite type).
Personal notes
I might now be the most expert GPC track builder in the world, but my skills as pixel artist are amateurish. The procedures I used for my circuits are only included for the record; if you want to learn how to produce good retro game art you should turn to better sources.
Also, a rant: I have hated the EGA palette since I was a kid. I always considered it a misstep between CGA (so abstract that it allows the brain to fill in the correct colors) and VGA (which for me was basically photorealism). This project did nothing to improve my opinion: every time I pasted a new piece of asset in mtPaint, most of the times the conversion to 16 colors reduced it into an unrecognizable, heavily posterized blob of pixels. Any progress required multiple attempts: increase the saturation to the maximum value (and sometimes repeat this step!), increase brightness and contrast, sometimes even adjust the separate R/G/B channels separately, check if any of the dithering options leads to a better outcome… not a pleasant process. Looking forward to mod VGA games!
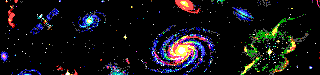
As you can deduce from the previous paragraph, my backgrounds consist of a collage of smaller digitized assets. For Möbius, I wanted the horizon to evoke the spirit of science fiction works of the Eighties and Nineties, where future was generally looked upon with optimism, cyberpunk was just one of many literary currents, and “tech” had not yet become the network of Torment Nexuses created by modern corporate. My space landscape is mainly inspired from the backgrounds of Master of Orion and other games, but in a gaudy, over-the-top style matching the spirit of the track. The source elements were generated via AI, specifically by Gemini.
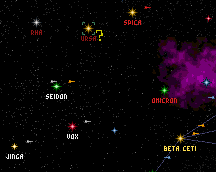
Using art stolen and digested by big tech was maybe acceptable for one track, but I wanted cleaner methods for the others. Digitized photos seemed the way to go for Baku, and fortunately Wikipedia Commons offered many pictures allowing to be remixed. Among views of the old city, of the sea and various other features, the source material was abundant, but how to put together pictures taken from such different points of view? The solution, you have already seen in the Baku panorama shown above: like the gold clouds in old Japanese battle screens, I used vegetation to separate the vignettes and hide the worst crimes against perspective and composition.
The result, I dare say, is pretty good! Baku’s views are so diverse that they make good use of the full 16-color palette, the images of fortress and skyscrapers are iconic, and the transitions do not disturb too much inside the limited field of view of the racecar. I was so satisfied that I invested time in the fine-tuning:
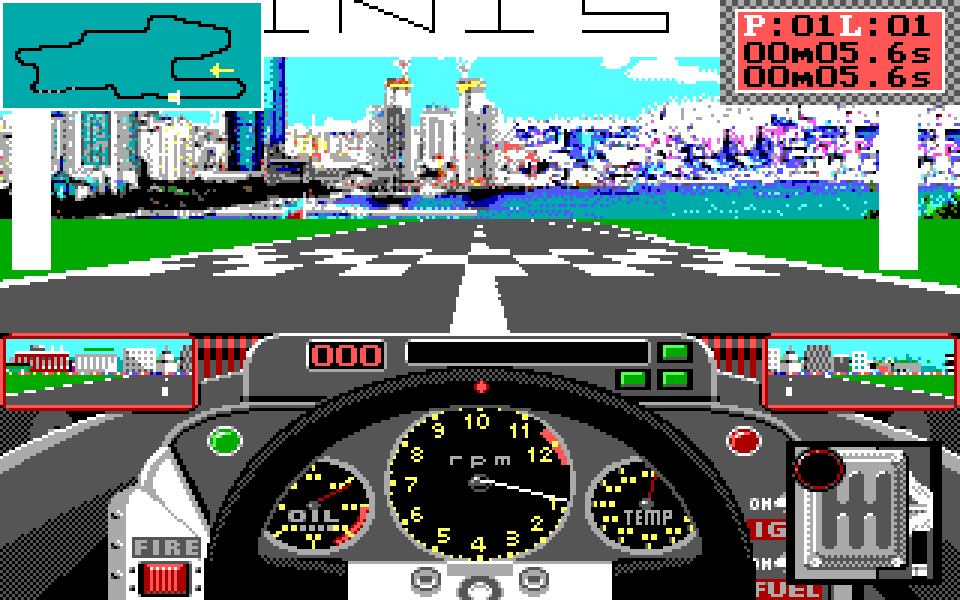
are partially hidden by the minimap.
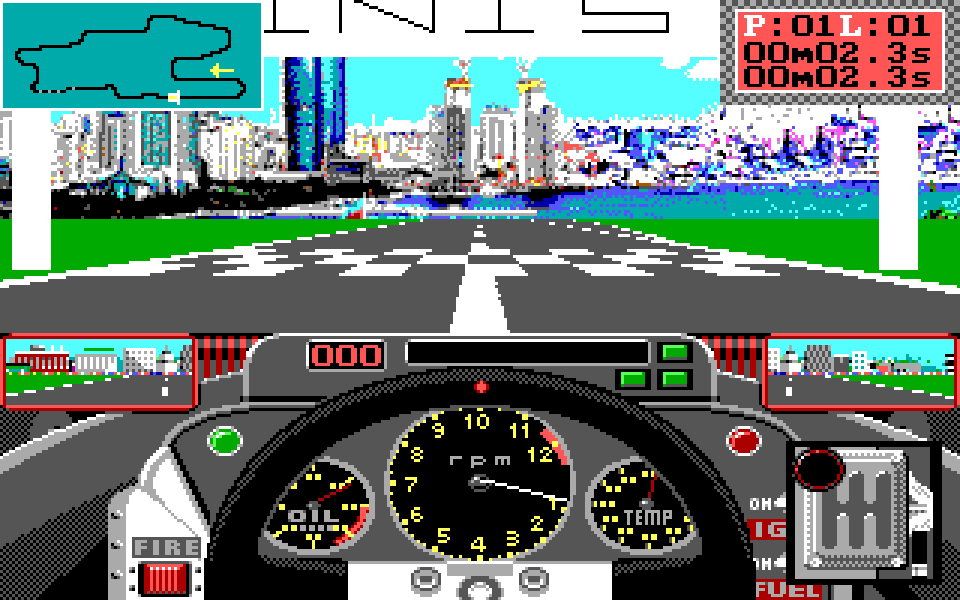
only covered by the banner, and ready to spring
into full view as soon as the car moves forward.
I am less satisfied about Spa’s background. I wanted my tracks’ personalities to be as contrasting as possible. This would imply using a different art technique for each one: in the case of Spa, my dream would have been to paint sketches by hand, maybe even in black and white! But I soon had to give up: my drawing skills are too bad.
Back to digitized photos, then. But Spa-Francorchamps offers much less to admire than the Azerbaijiani capital: once placed the iconic grandstand in front of the Eau Rouge, the rest of the source material just showed hills all around: bland and, it turned out, very hard to convert into 16-bit format. I took an artistic license and interpolated a picture of the village of Baileux, which is 150 km away from the track but whose Belgian architecture seemed a good fit nonetheless. The result was still lacking in personality, so I decided for a bold move: I took the “flood fill” tool and in one click I turned the banal cyan sky into gray.
.jpg)
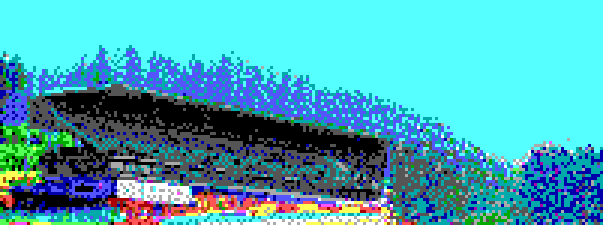
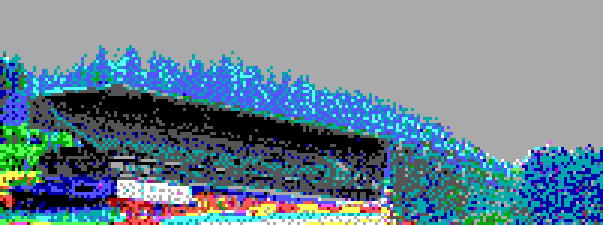
The blue trees make the result even a tad winter-ish. Maybe exaggerated, but I'll take it.
It worked! The whole panorama took an autumnal character that fits really well the atmoshpere of Spa: in GPC there is no rain and no wet tyres, but in a long race you can now pretend to worry about the weather conditions, and maybe even look at the asphalt to see if there puddles forming.
Minimap syncing
The creative work is done, but a couple of chores expect you before you can call it a day. Minimap syncing, in particular, is a killjoy, but it’s worth to bite the bullet and do your best: a good minimap also makes AI calibration easier.
As explained in the first part of this series, GPC uses an array to relate the track segment a car occupies with its X-Y position on the track’s minimap. Syncing the minimap means adjusting the list of coordinates so that they match the minimap you have prepared.
The X-Y lists for each circuit start at these offsets, listed in the DS:12FE pointer array:
| Track | X-Y begin |
|---|---|
| Brazil | 1316 |
| Monaco | 149A |
| Canada | 15AA |
| Detroit | 1704 |
| Britain | 1846 |
| Germany | 19BA |
| Italy | 1BBE |
| Japan | 1D7C |
If the car is on the first track segment (back of the starting grid), the X-Y coordinates of the minimap cursor are given by the first pair of bytes of the list. Every ~7 segments of advancement, the cursor will move to the next pair.
You just need to fill in the pairs. The problem is that the list is long: the one for Spa contains 232 coordinate pairs. I have not found a good method to do the work, and the following is the best I could devise. If you can, open the Spa minimap and the video of the “huge compass” map in additional browser tabs: I will use these as example.
- Run the script
minimap--follow-path.pyon your minimap, giving the first pixel after the start line as parameter: this generates a text file with the coordinates of all black points making up the path, in logical order. We’ll call it “the unabridged list”.- Add the coordinates of the start/finish line at the beginning and end of the unabridged list.
- You can annotate the list with positions of the corners and other features.
- Replace the target X-Y array with my boustrophedonic list, whose effects you can see in the “giant compass” video.
- When you use this special list, the minimap cursor moves over a 10x10 matrix of possible positions, making it easier to determine the index it is currently in. In lines 1, 3, 5… the cursor runs from left to right, in lines 2, 4, 6… in the opposite verse: this is to help you distinguish adjacent lines.
- Now record a video of a lap run with this X-Y list, and analyze it.
- To show how the analysis is done I’ll use the Spa video as example:
- When the car crosses the checkered pavement, the cursor is in the first line, sixth position4. This corresponds to index 06, so we find the “start line” feature in our unabridged list (in the case of Spa,
(15, 25), i.e. the white pixel) and annotate that it will go into the 6th position. - When the car hits the apex of the first curve (the Source), the cursor is in the second line, sixth column counting from the right. This corresponds to index 17, so we find the coordinates of the Source in our unabridged list (they are
(2, 31), i.e. the black pixel on the bottom left) and annotate they must go in the 17th entry. - When the car hits the apex of the slight, unnamed bend in the following straight, the cursor is in the third line, seventh column counting from the left. This corresponds to index 27, so we find the coordinates of the bend (they are
(6, 23)) and annotate they must go in the 27th position. - …I think you got the spirit. Soldier on till you complete the lap.
- When the car crosses the checkered pavement, the cursor is in the first line, sixth position4. This corresponds to index 06, so we find the “start line” feature in our unabridged list (in the case of Spa,
- After you are finished, it’s time to abridge.
- We annotated that the start line is entry #6 and the Source apex is #17. This means that the final list must include 10 points between these two landmarks. The unabridged list contains many more: mark 10 of them (more or less equispaced) for inclusion.
- The Source apex is entry #17, the unnamed bend is #27. Mark 9 coordinate pairs between the Source and the bend for inclusion.
- …proceed this way till the end of the lap.
- Create the abridged list, copy-pasting the coordinate pairs of the landmarks (start line, curve apexes) and the additional pairs marked for inclusion.
- Replace the boustrophedonic array used with the abridged list you created.
- If you are using assembly, you can use this other script to create the
dbdirectives data, or you can just type in the numbers.
- If you are using assembly, you can use this other script to create the
If you did everything with care, your minimap should start to work fine. To improve the precision, run and record additional laps, noting down where the minimap cursor is “too early” (add a pair) or “too late” (remove a pair). Remember that each addition and deletion will affect all the rest of the track. When you are satisfied – or fed up with the process – proceed with the final step.
AI calibration
This task also requires some patience, but it’s infinitely better than the previous one. At the very least here there is margin for a personal touch. The “AI” data is simply a list of bytes, one for each cursor position of the minimap, indicating the “base” opponent speed in that zone. The real opponent speed is affected by the difficulty level and by the strength of the specific adversary, but the base speed is the main factor: if you put a “100” in one zone, nobody will run at 200 mph there.
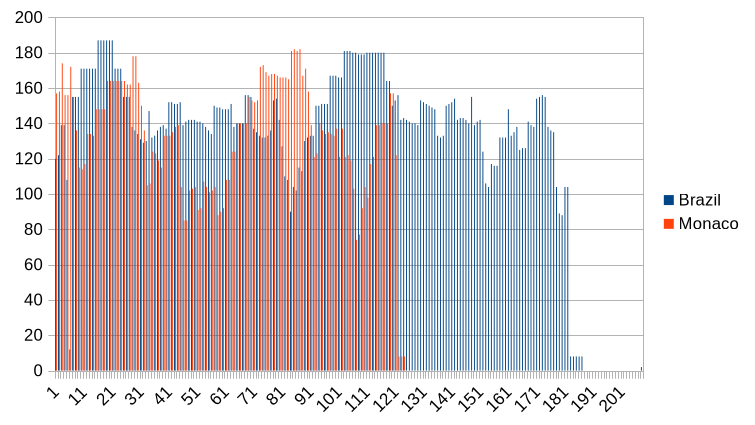
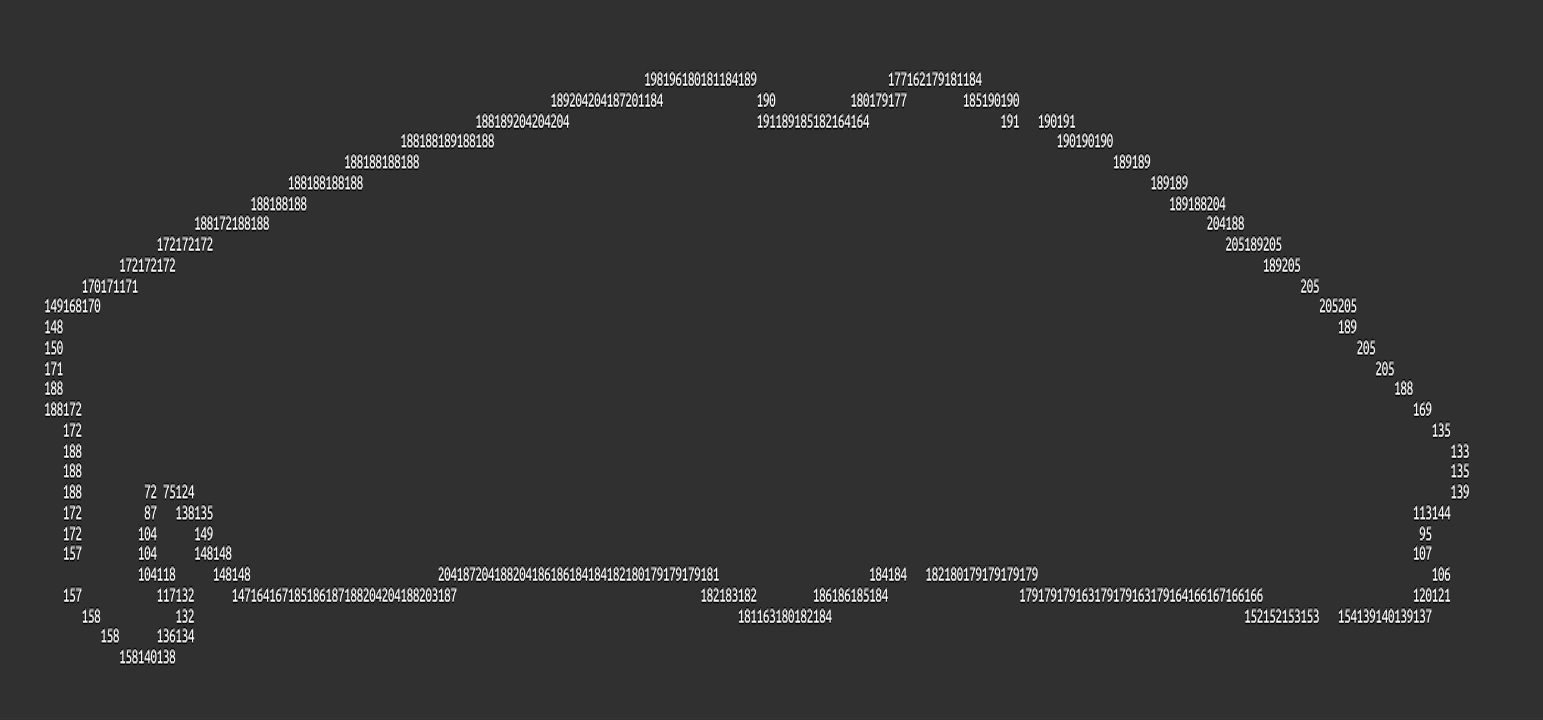
The “speed maps” like the one on the right are available here.
Here’s my method to create the array of base speeds:
- Start from the filtered X-Y list you created in the previous step.
- Create an empty column beside it to write the speeds.
- Locate the first sharp curve. In the speed column, put the speed at which it must be negotiated.
- In the following straight, accelerate. At each line forming the straight, increase the base speed by 3–7 mph from the line before (higher values at lower speeds, and viceversa).
- When you reach another curve, drop the speed quickly (reduce it by 20–30 mph per line) until it matches the speed needed to navigate that corner.
- Proceed till you complete a lap.
After you are done, copy the array in its data segment location. The offsets, listed at DS:1F4C, are:
| Track | Speed array begin |
|---|---|
| Brazil | 26CE |
| Monaco | 2B87 |
| Canada | 313F |
| Detroit | 3777 |
| Britain | 3E4D |
| Germany | 46AB |
| Italy | 4E53 |
| Japan | 5636 |
Now run some races, checking that your adversaries are as strong or as weak as you desire. When calibrating the difficulty, also consider that you are still a beginner on your newly-built track: try to make opponents that will be challenging even when you become more experienced.
Lastly, set the AI qualification times: Go to the offset 0x12DC + 4 * track_index, and overwrite the following 4 bytes with two uint16:
- The first number represents the average qualification time of the strongest opponent, in tenths of second5.
- The second number is the average gap between a qualifier and the one immediately behind him, also in tenths of second. GPC’s values for this parameter range from 8 (Monaco) to 12 (Hockenheim).
After you adjust these last variables, suddenly, your labours are finished: congratulations, your track is ready!
Enjoy responsibly
This was a long journey: if you have read everything, thank you for the attention! I do not know if anyone will ever follow the instructions and enrich GPC with new circuits; if you manage it, let me know. Grand Prix Circuit needed 38 years to receive its first mod, maybe it will take till year 2064 before a twelfth track appears, but I’m not in a hurry.
My mod Don Matrelli’s Legacy and its three original tracks can be downloaded from my GPC project page. Should you make a new circuit, or even a full mod, I’ll be glad to add a link to your creation.
In the next post of the series we will learn how to customize cars and opponents. Rejoice o reader, for the process is much faster and easier.
See you soon!